ThinkPad X1用U盘重装系统Win11教程
ThinkPad X1是一款高端商务轻薄本,做工好,屏幕素质高,性能流畅,键盘手感舒适,续航长,深受用户的喜爱,近期有用户想要给ThinkPad X1使用U盘重装系统,那么应该如何操作呢?我们来看看这篇ThinkPad X1用U盘重装系统Win11教程吧。
准备工作:
1、U盘一个(尽量使用8G以上的U盘)。
2、一台正常联网可使用的电脑。
3、下载U盘启动盘制作工具:石大师(http://www.xitongzhijia.net/soft/243542.html)。
U盘启动盘制作步骤:
注意:制作期间,U盘会被格式化,因此U盘中的重要文件请注意备份。如果需要安装系统的是C盘,重要文件请勿放在C盘和桌面上。
1、运行“石大师一键重装”点击“我知道了”。

2、选择“U盘启动”点击“开始制作”。

3、正在下载U盘启动工具制作时所需的组件,请耐心等待。

4、跳出提示备份U盘内重要资料,如无需备份,点击“确定”。

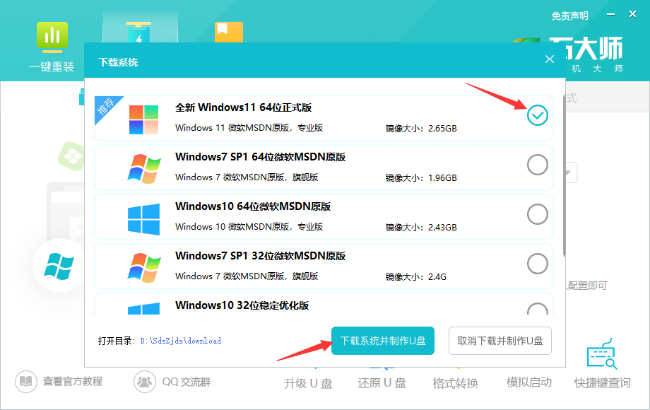
5、选择自己想要安装的系统镜像,点击“下载系统并制作”,本软件提供的系统为原版系统(也可选择取消下载系统制作)。
6、正在下载系统镜像,请勿关闭软件。

7、正在制作U盘启动工具。

8、正在拷备系统镜像到U盘。

9、提示制作完成,点击“确定”。

10、选择“模拟启动”,点击“BIOS”。

11、出现这个界面,表示石大师U盘启动工具已制作成功。

U盘装系统:
1、查找自己电脑主板的U盘启动盘快捷键。

2、制作好的U盘启动盘依然插在电脑上,重启电脑按快捷键选择U盘进行启动,进入后,键盘↑↓键选择第二个【02】启动Windows10PE x64(网络版),然后回车。(这个PE系统只是方便用户进行操作的,跟用户要安装什么系统无关)

3、进入PE界面后,点击桌面的一键重装系统。

4、打开工具后,点击浏览选择U盘中的下载好的系统镜像ISO。
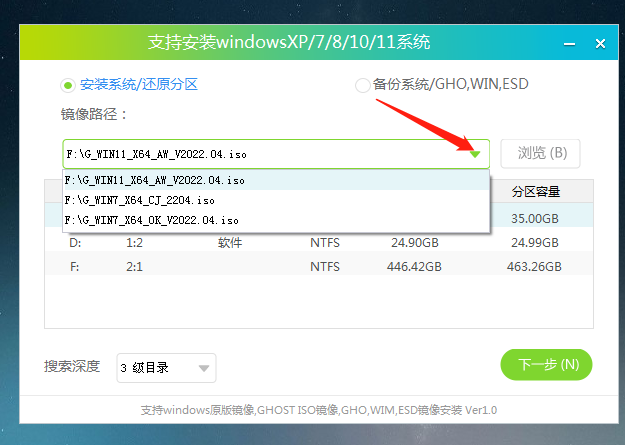
5、选择后,再选择系统安装的分区,一般为C区,如若软件识别错误,需用户自行选择。选择完毕后点击下一步。

6、此页面直接点击安装即可。

7、系统正在安装,请等候……

8、系统安装完毕后,软件会自动提示需要重启,并且拔出U盘,请用户拔出U盘再重启电脑。

9、重启后,系统将自动进入系统安装界面,到此,装机就成功了!

若对以上内容有疑问请联系反馈
文章价值
100
